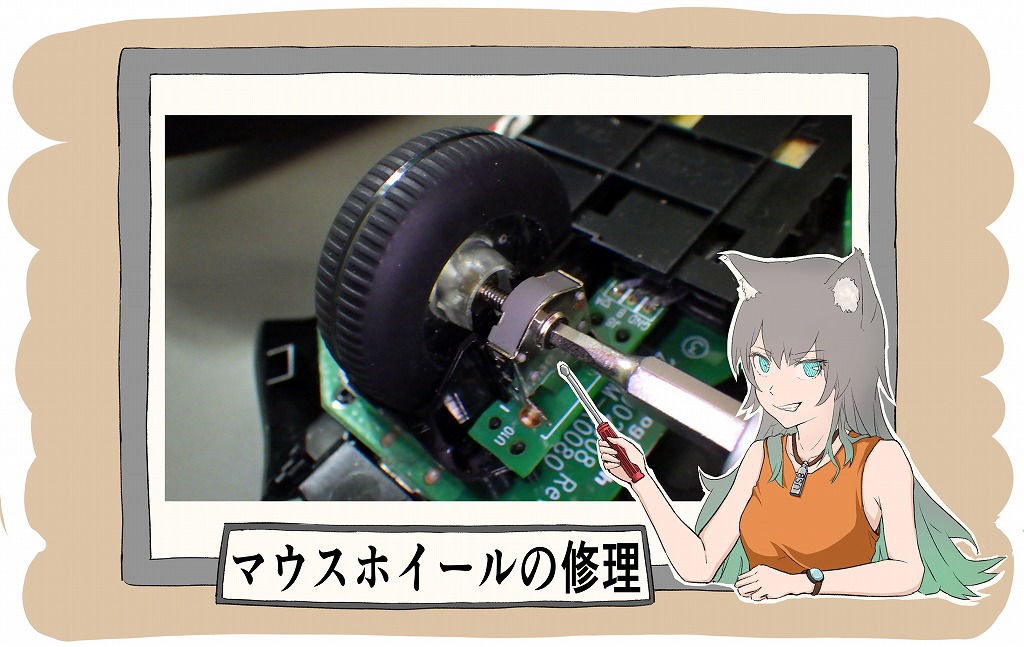
In this article, we will explain how to repair a mouse wheel, which breaks on gaming devices, in as simple a manner as possible.
Some gaming mouse cost close to $100 , so I hope his arthicle will help you fix it for a few mony.
Two common types of mouse wheel breakage
There are probably two types of broken mouse wheel.
These are probably the only two types.
We have divided explassion them into separate descriptins, so please click on the buttons below each symptom description to jump to the next one.
Symptom 1:Rotary encoder failure (Electric hardware error)
This type of failure is broken rotary encode. (Hardware error)
Symptoms include the following,
・Unintended directional mobement when scrolling. (sometimes it goes up even though it is moving down)
・Wheel operation is not working.
・Sometimes the wheel operation is unresponsive.
These simple malfunctions can be fixed with a few $1s for a replavement part on Amazon, etc.
However , if you ask for repair, you might be charged $10s or have exchange a new one, whick is very wasteful.
It is surprisingly easy to repair a rotary encode because it works as it should by replacing the part called a rotary encoder.
Many types of Encoders are sold in large numbers as shown below, so you should have no trouble.

Failure of the whee itself (Mechanical filure)
This type of failure, Mechanical parts is damaged.
It would be better if it can be repaired with adhesive materials, but if it is physically missing. the only solution is to replace it.
For this type of failure, disassemble the mouse onece and determine whether the internal parts are broken or not.
In many cases, it may be something like "the wheel part that truns the encode was damaged."
However, replacing it is expensive in many ways, and Logitech, which I use, only supports the purchase of a new one if the warranty period has expaired.
So I have put togethe a method to deal with such a situation even if there is nothing you can do about it.
It would be a waste to buy a new mouse that costs more than $100s over and over again.
Isn't it a bit of a bargain to think that you can revive something that would otherwise be thrown away for about $10 ?
①:Replace encoder (Repairing electrical components)
I will explain how to replace and repair the "rotary encoder", a commponent that detects the rotation of the mouse wheel.
The rotary encoder is a partthat converts rotation into a pulse signal and outputs it.
It is use d rather heavily in games that make full use of wheel operations, etc. So it is prone to breakage.
The parts, Rotay encoder like the following figure.
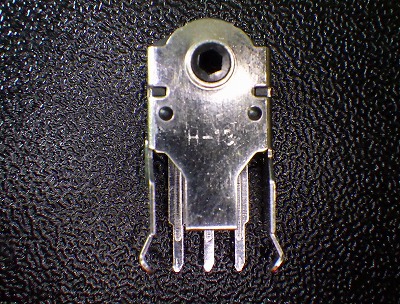
Replace this part.
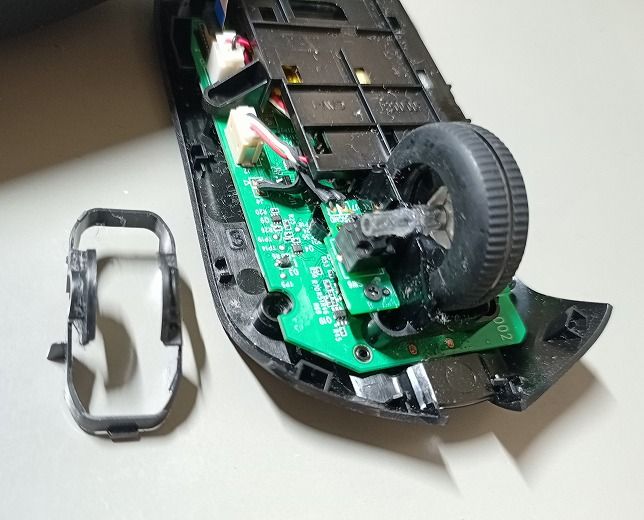
Disassemble the Mouse!
Now, let's disassemble the mouse.
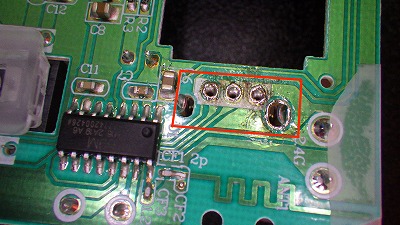
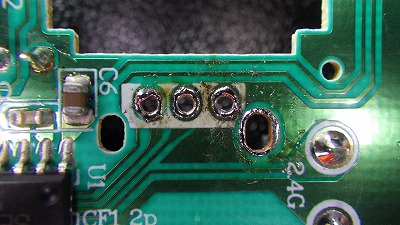
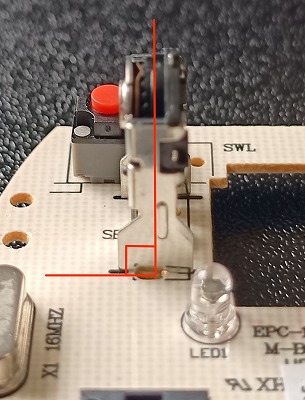
The red framed part is the part to be replaced this time.

Remove all visible screws.

The red frame below is the part that holds the encoder in place, so you will need to remove the part by placing your soldering iron here.
You will need some tools here, but a cheap iron and a solder sucker will do the job.
You can also work with a solder sucker wire.
Below is a link to a cheap product that includes a soldering iron, solder, and suction wire set.
This price is about $5.
It is good to have one of these products. You can use it for various repairs.

How to Remove?
Now we will remove the rotary encoder.
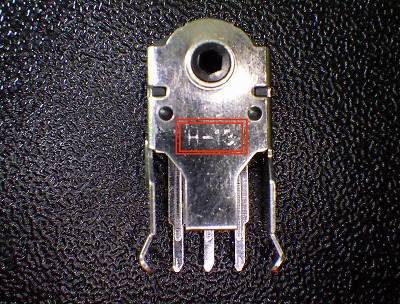
This time, the part has three terminal legs and two fixing legs, for a total of five legs.
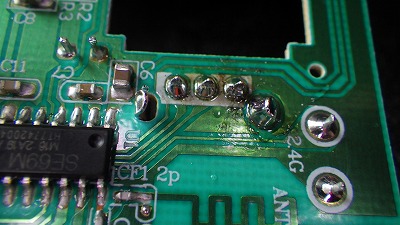
Heating each of them one by one will not remove the encoder once one of them cools down, so to heat them simultaneously, apply a soldering iron as shown below.

It is easy to heap solder on the terminals to facilitate heating at this time, so that the soldering iron can heat all five at the same time juist by applying the soldering iro.
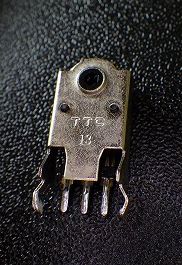
When you have finished remobing the componet, check the number marked on the surface of the component.
In this case,it is marked "TTC 13".
As it turned out after purchasing the part this time, this dimension seems to be the standard for rotary encoders for mouse wheels.
Therefore, we need to find a part that corresponds to this dimension.
Purchaseing Parts on Amazon!
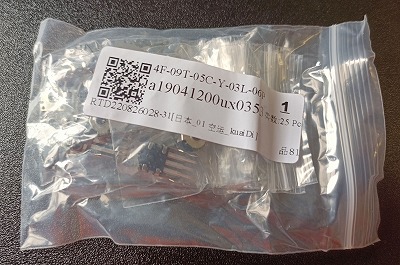
This time. I selected parts frome Amazon for easy availability.
There seem to be differences in various shapes, but as long as these dimensions are correct, they can used without any problems.
This time, we wanted to confirm that tha listed dimensions could really be used, so I purchased one that contained multiple types.
They are as follow links.↓↓↓

When puchasing one type of product, the average cost is about 500yen for a set, so the pure repair cost is about 100 yen.
Check and install the received parts
When the parts arrive, check that they are the desired size.
In this case, the part
Take out the same size as the removed part an check it.
In this case, we wanted 13mm, so we selected and used 13.
Solder the new part
Attach the new part to the preciously removed part.
There are five holes in the part that was removed earlier. Make sure to install the part in the original orientation.
If it is wobbly and difficult to install, you can use tape or other means to secure it as shown below.
After installation is complete, check for solder in unnecessary places'(no shorts).
Check also from above to see if the encoder angle is perpendicular to the bord surface.
If there are no problems, the replacement work is complete.
Check the operation
After all the work is completed, return the mouse to its original position and check the operation.
If the scrolling operation is stabel, the repair is complete.
If it has not working, it is a good idea to review the following points.
・Is the encoder oriented correctly ?
・Is the encoder terminal shorted? (Is the solder stuck in an unnecessary plave?)
・Have you reassembled it back together ? (Sometimes there are those with circuits attached to the top board that don't work unless they are all assembled.)
If this fixes it, you are good to go.
Thanks for the repair work.
②:Repairing a broken wheel part (Repairing mechanical components)
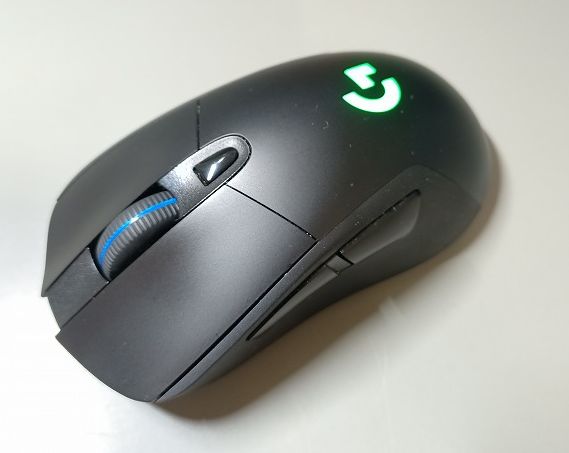
This time, the failed part was a Logitech G703 that I purchased about two years ago, so I will use this example to show an example of ripairing a broken wheel.
This repair is a little more difficult than replacing the rotary encoder. You need to have certain amout of feel for it because you have to modify it yourself to fit the mouse.
But fortunately, since we are repairing G703 this time, it may be helpfull for many people. (Because this mouse is famous for gamer !)
In that case, you can do it the same way.
As for the parts to be repaired on your own this time, there are actually replacements available.
However, they are a bit expensive, so we will try to repair them at a resonable price.
Disassembly the G703h
Since this is a rather popular mouse, I would like to carefully show the disassembly process.
It is rather difficult to disassemble, so be careful not to destroy it! (I have destroyed it)

First, flip it over, peel off the sole, and remove the screws.
It may be difficult to reuse the mouse sole.
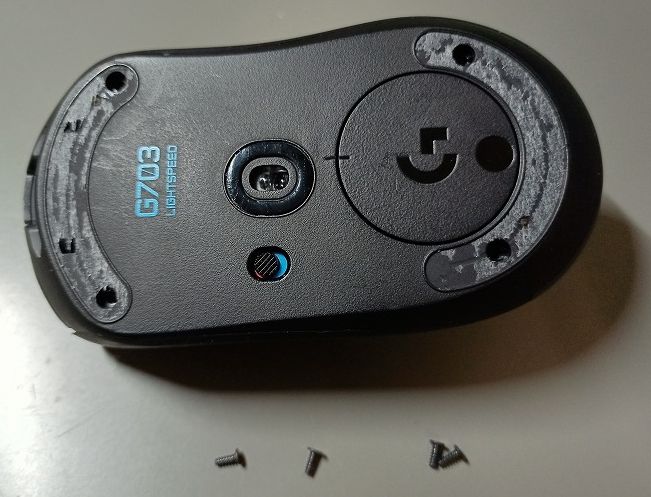
Don't forget to remove all the screws.
All the screws are from the bottom.
There are no screws at the wireless charging lid, so you should be fine.
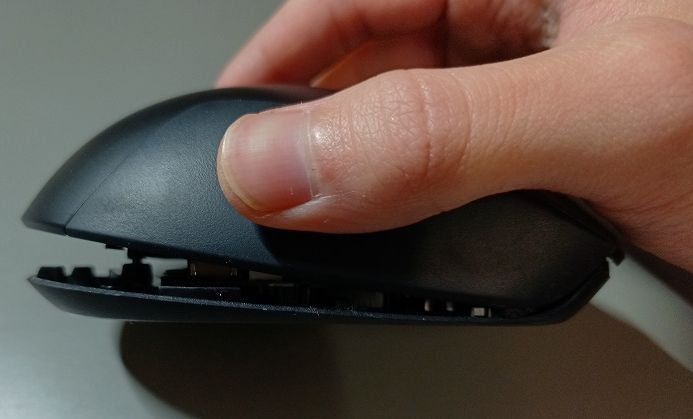
When the screws are removed, they loosem as shown above.
Be careful not to pull it upwards as this will cause it to break !!
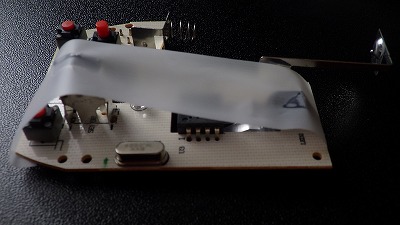
In the above image, the top lid can be easily removed by sliding the top lid to the right and the bottom base to the left.
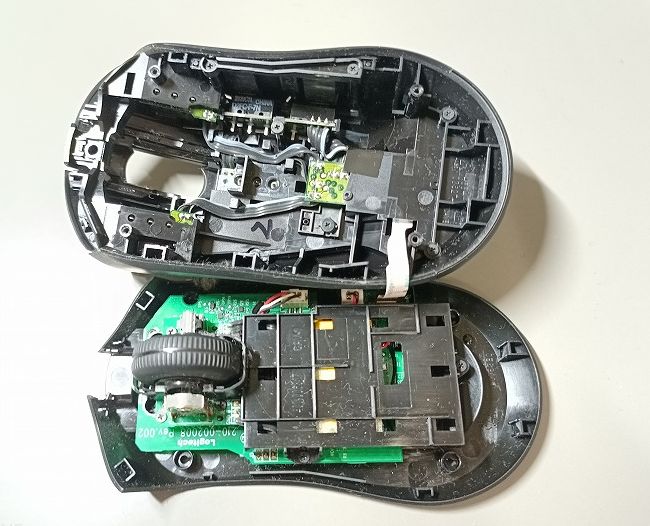
When removed, it looks like this.
The swich is located on the top. There is also a communication cable to light the LEDs on the top.
The mouse also has a DPI change button on top, which caused chatttering two days after purchase. ( ;∀;)
I'll check the wheel for symptoms.
It is completely crazy.
It's a malfunction that feels like it's spinning freely when you slide it with your hand.
The problem is that when you slide the wheel by hand, it seems to rotate freely.
Next, remove the wheel to see if theproblem is in the wheel or the encoder.
Since there is a hold dowm, remove the wheel while spreading the plastic as shown below.
I was able to remove it safely.
It is very dusty and dirty.
The wheel can then be easily removed and check to se if the encoder is malfunctioning.
When removing the wheel, do not forget to unscrew the screws on the stand holding the encoder, so that it can move freely as shown below.
I found a good hex driver and tried to turn it, but it seemd to turn properly because I could feel it stiffening.
So, this time, the problem is not with the encoder but with the wheel itself.
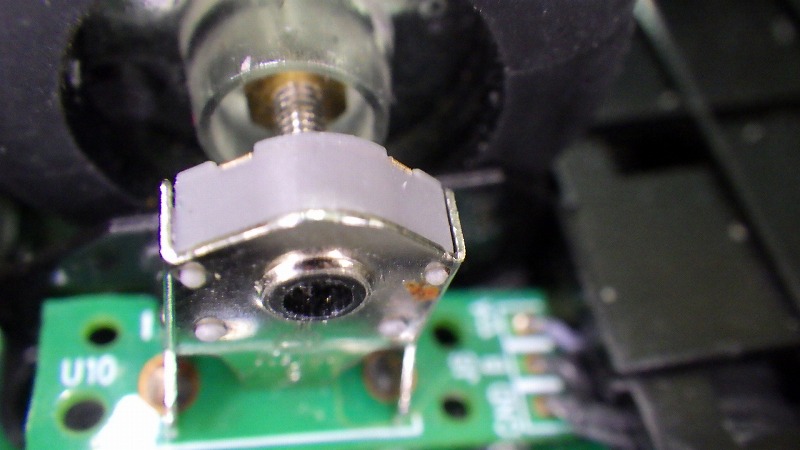
Check a failed component
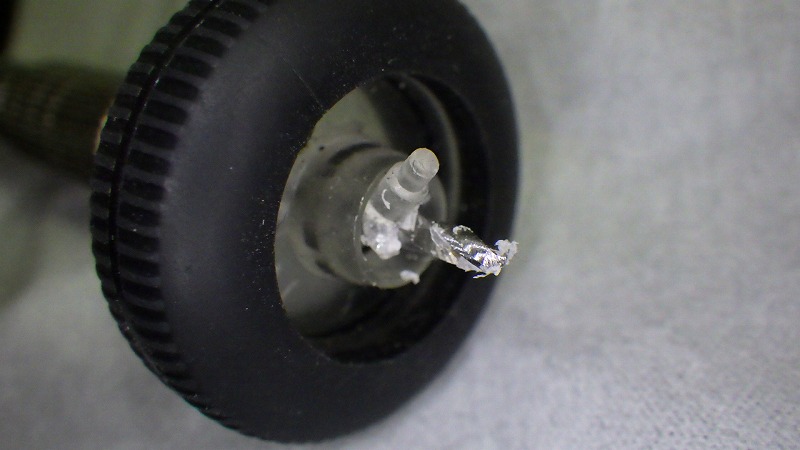
Now, let's observe the wheel (mechanical part) in question, shall we?
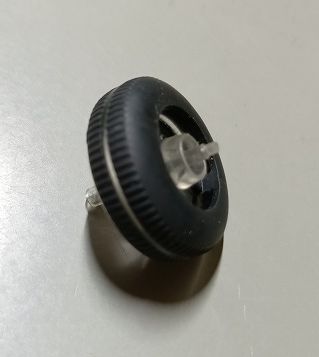
It is a little hard to see, but it seems that the thin protuberances growing from the wheel are hexagonal, and that they transmit rotation by engaging with the encoder.
When I disassembled it, I found a little white powder, but it seems that this area was worn away and rounded off, making it impossible to send rotation signals.
Hmmm, honestly, I wish these parts were made of metal.
They cost almost $100, but they are poorly made.... 🤔
Well, the manufacturer must be having a hard time with the cost.
This time, I will go with the strategy of repairing and reinforcing this.
Before Going in for Repair
Before starting the repair, there is a way to avoid having to do it yourself.
This wheel is not a genuine product, but is sold as a replacement part by another manufacturer.
I don't know about the quality, but I think it can probably be used normally.
However, since it cost almost $20 including shipping costs in japan, some people may be willing to buy a new mouse, I guess.
I'll post the link as a reference for those who want a quick fix.
I'll repair it on the cheap!
Now, it would be nice to buy the parts and complete the repair quickly, but with a few tools, I can fix it for about $2 for the cost of the screw, so I will give it a try.
The strategy for this repair is to replace the missing hexagonal projection with a metel screw.
Fortunately, there was a hole on the side from the beginning, so we will use a pin vise to thread the screw through it.
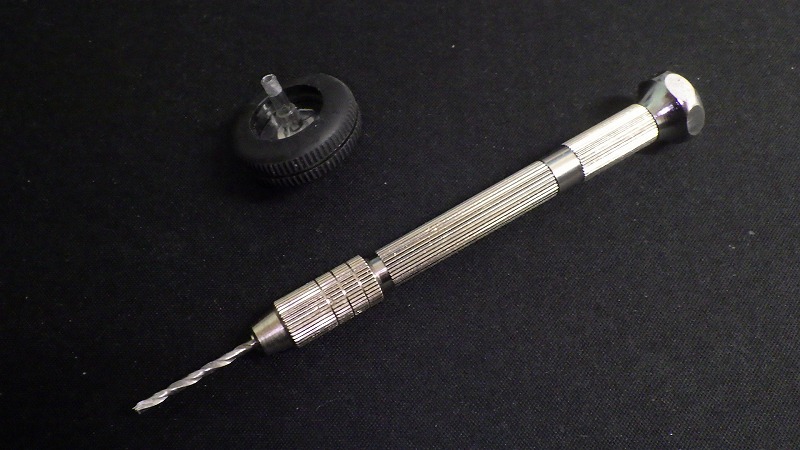


I was able to bump it out well.
Good thing there was a hole in the beginning to serve as a guide.
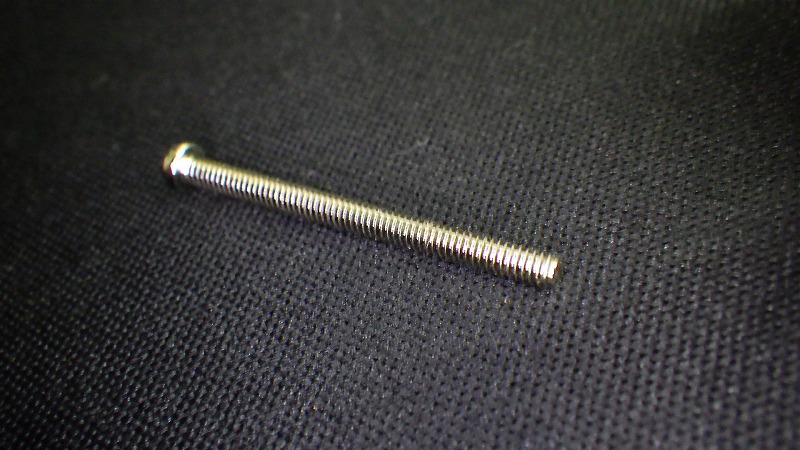
Insert the right M2 long screw here.
You can buy them for a few dollars at a home improvement store.
Insert the screw so that the head of the screw is on the opposite side from the side where the encoder is located.
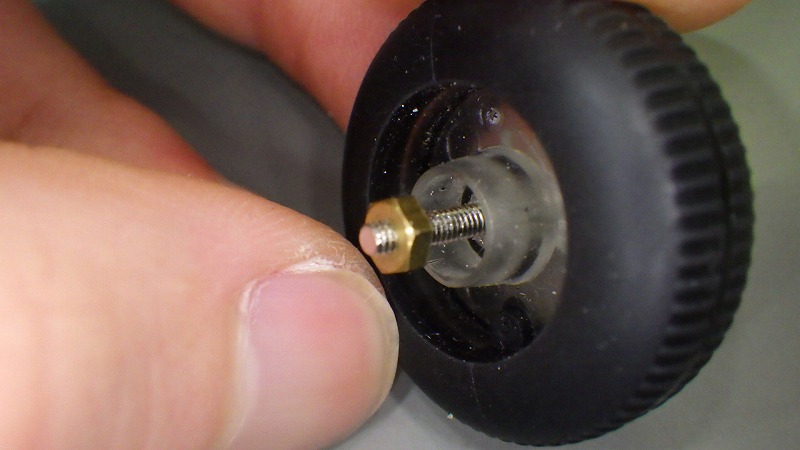
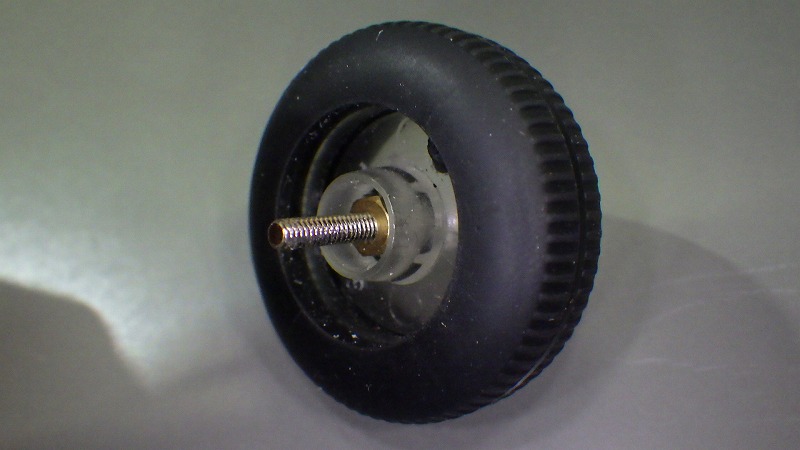
It was able to be stopped cleanly.
At this time, make sure to tighten this screw and the wheel firmly.
It is not a bad idea to use strong glue to glue them together.

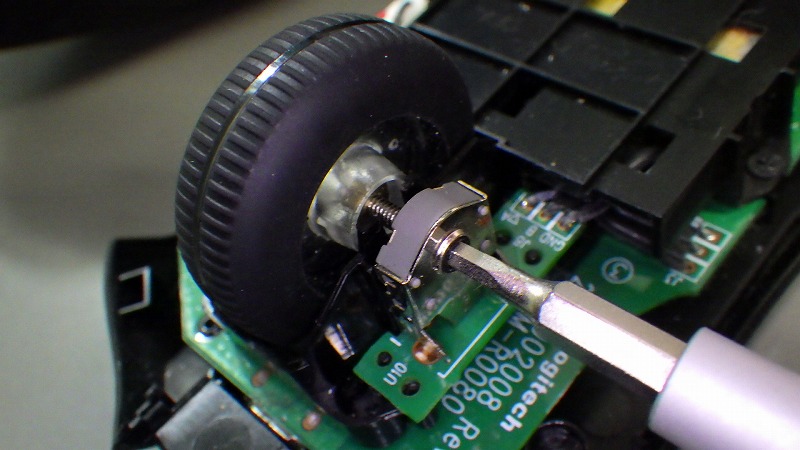
Next, connect the screw to the encoder.
Naturally, the encoder's slot is hexagonal, so sliding the screw into the encoder as it is will not work.
Therefore, as shown below, rotate the wheel holding it from the opposite side with an M2 hex driver and screw it in a little at a time.
※Postscript
I have used this fixed mouse for about one year, and there is no problem at all without any adhesive.
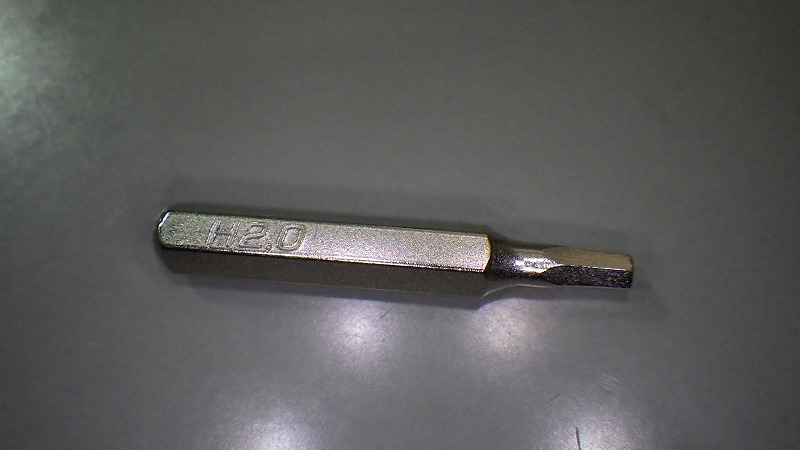
Above left is the 2mm hex driver we used.
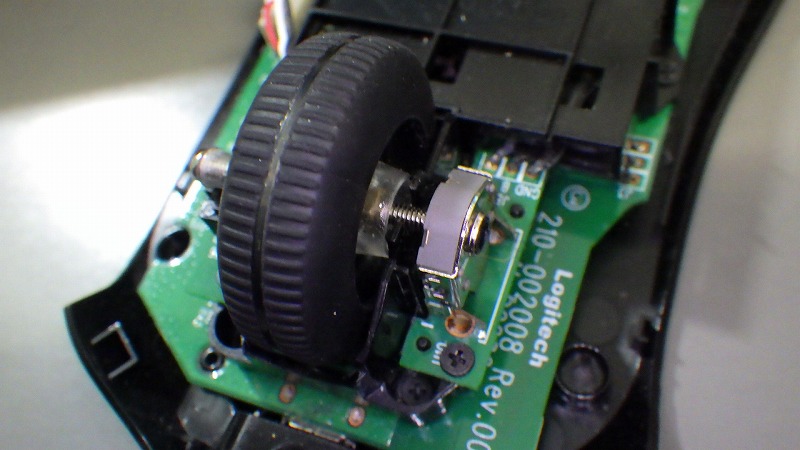
It was successfully screwed in !
The depth of screwing in is appropriate as long as the encoder is not tightened in such a way that force is applied to the encoder or the wheel hits other places.


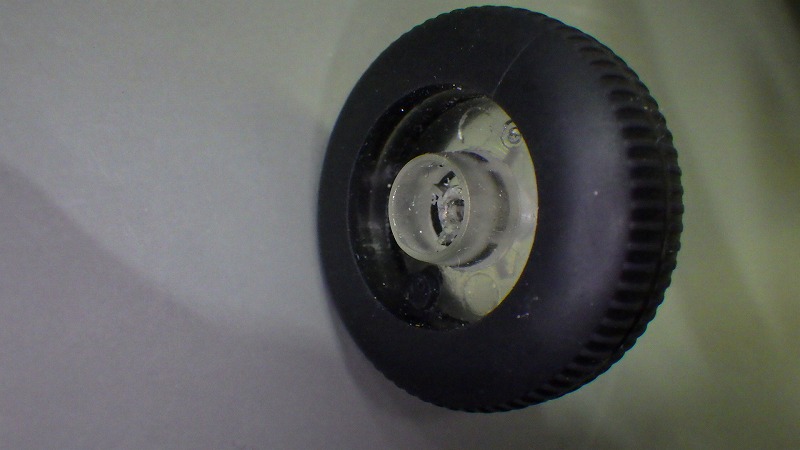
Finally, I will include a photo of the entire project.
As you can see below, the repair was done very nicely.
If you can move the wheel and confirm that the spinning feel has returned, you can say that the repair was done correctly.
Now you can finish the job by putting back the screws you removed in the reverse order, sliding back the top lid, and reattaching the mouse sole.
Thank you for your hard work.
Conclusion
How was it?
In this article, I explained how to repair a mouse wheel by dividing it into different failure patterns.
There are many types of mice, but I think that most of them can be repaired using the methods described in this article.
Mice are used heavily, so it is true to say that they are consumable goods, but many people hesitate to replace expensive mice such as Logitech's frequently.
If it is a malfunction like this one, why not give it a try ?
For a little effort and a few dollars in parts, you can save money and the time it takes to get used to a new mice.
The tools used in this project were selected to be as inexpensive as possible, so please refer to the links below.
See you soon.
※Rotary Encoder Sales Links
There are various sizes, but you can probably find what you are looking for.


↓↓↓ All-in-one product (may be the cheapest per part)
※Tools purchased this time(some substitutes)
M2 screw:About $2 at Home depot
【Logicool G703】マウスホイールを修理する方法について解説する